Video Tutorial: Navigate the Basics of the Color Wheels
The color wheels can be intimidating at first glance, but they're easy to navigate when simplified. Learn the basics with this guide.

Navigate the Basics of the Color Wheels
The color wheels can be intimidating at first glance, but they're easy to navigate when simplified. Learn the basics.
Color Wheels Introduction
Like our previous episode on the curves, we're using DaVinci Resolve. The color wheels are a universal tool used similarly across all software with a three-way color corrector. And in fact, Adobe Lightroom has recently incorporated one.
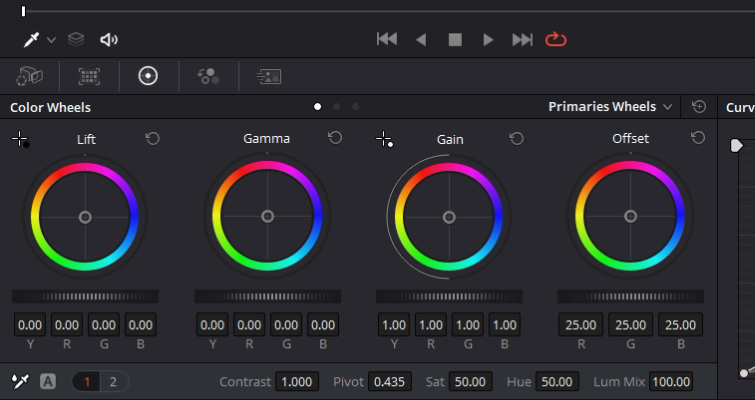
Although we'll be focusing on the three to the left, there are four identical-looking wheels that also operate identically. However, the adjustments will vary with each wheel. Each wheel represents a different tonal range, and the hue adjustments will, for the most part, only affect the specified range that corresponds with the selected wheel.
They are separated as lift, gamma, and gain, which primarily corresponds to the shadows, midtones, and highlights, but not precisely.
Perhaps the best way to demonstrate how these regions operate is with the master wheel. You'll find the master wheel directly underneath the color wheels. These allow you to adjust the YRGB channels together, which will adjust the luminance for tonal regions. Dragging a master wheel to the left makes the corresponding tonal area darker, and dragging it to the right makes that tonal region lighter.
Tonal Regions
The regions overlap, and quite broadly too. Everything intersects, meaning your adjustments smoothly transition into the corresponding tonal region. As such, you can make subtle and naturalistic adjustments using these controls.
As a result, when you add blue into the gamma, you'll also be slightly affecting the edges of the lift and gain.
In the lift slot, red has primarily affected the darker areas of the image, leaving the sky its natural color because that has the brightest luminance values. The gamma adjustment has left the dark shadows and bright highlights somewhat neutral but has given the image an overall red cast. The gain adjustment completely affected the sky and bright areas on the ground.
In summary, while the hue will somewhat affect the overlapping region, where you input that hue will dictate how the image is affected.
In Practice
Let's say the client has asked you to slightly warm the shot so it doesn't look as cold and to make sure we have maximum contrast.
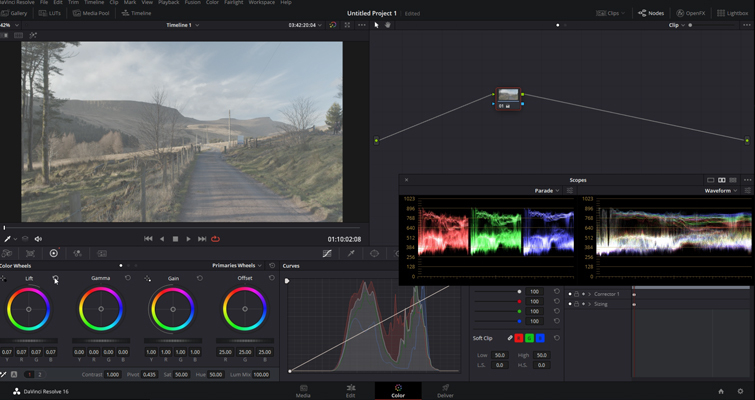
Before we manipulate the color, let's fix the contrast with the master wheels. Lower the lift, push up the gain quite a bit, and then lower the gamma. Now, we have an image with maximized luma values.
Now, we need to warm the image. As we can see in the scopes, most of the information in the midtones shows that the gamma has the most overlapping for the tonal regions. So, let's add some warmth to the gamma wheel by pushing the center point toward the reddish hue.
The problem is that we've got warm dark areas; typically, shadows aren't warm in color. To fix this, go to the lift wheel and add blue to the shadow to counter the addition of that red hue that slipped into the shadows.
Offset Wheel
The offset color wheel allows you to adjust the entire tonal range of the YRGB channels. The color balance control will simultaneously adjust all hue values across the three tonal regions. Need to raise the luma values of the whole image and not just the midtones? Just use the offset color master wheel.