Smooth Slow Motion With Generated Frames
Slow a clip down and let FFmpeg minterpolate invent the in-between frames, so the result glides instead of stuttering.
Drag & drop your video here, or click to browse
Max file size: ~2 GB (memory permitting)
How to Use — Smooth Slow Motion With Generated Frames
Upload your clip
Drag and drop the video. The tool reads its resolution and duration on the spot — those two numbers decide the whole cost of the job.
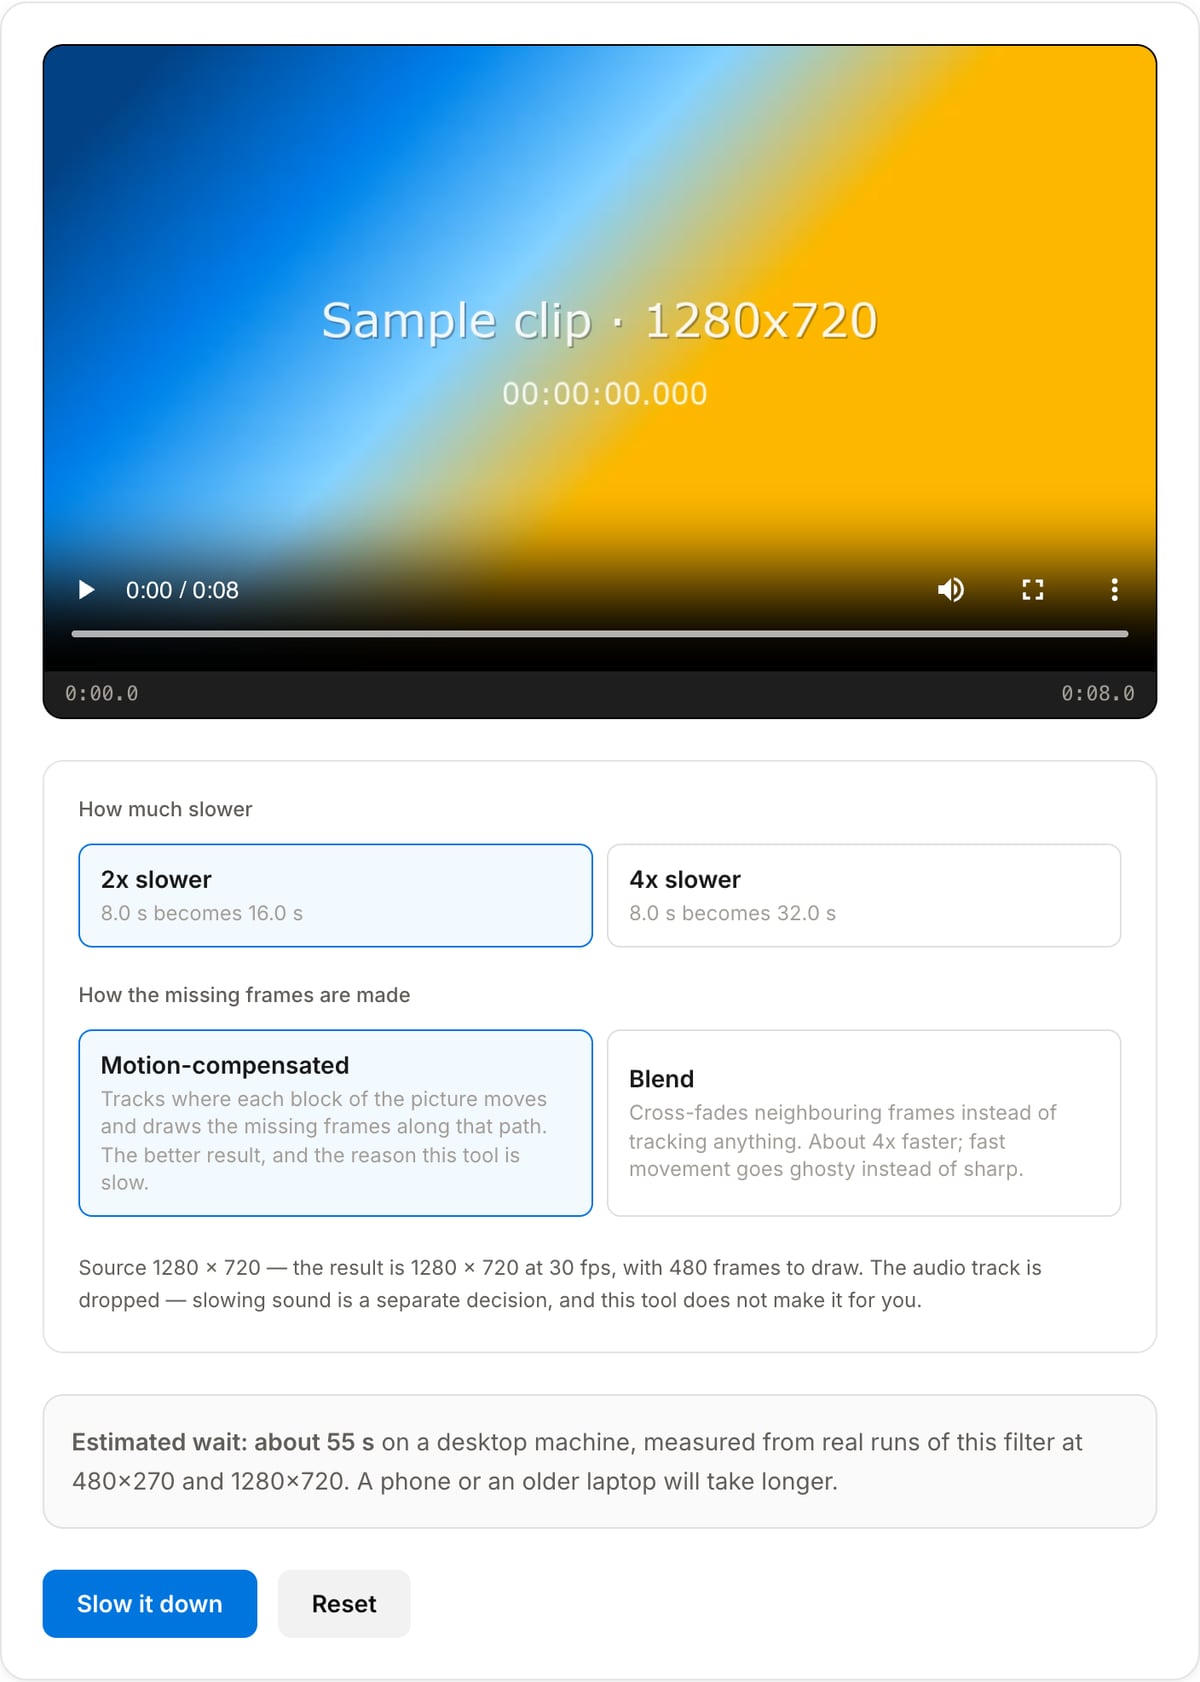
Pick a slow factor
2x or 4x. Each button shows what your clip’s runtime becomes, and the card below shows how many frames have to be drawn to get there.
Choose how the frames are made
Motion-compensated tracks movement and keeps edges sharp. Blend cross-fades instead — about four times faster, and useful for checking the timing before a long run.
Check the estimate, then run
The estimated wait sits above the button and turns into a warning past a minute. Trim first if it is long. The result is an MP4 at 30 fps, at the source resolution (trimmed to an even width and height, which H.264 requires), with no audio.
What the tool looks like
Best for / not for
Best for
- Short moments — a few seconds — from 24, 25 or 30 fps footage that steps visibly when slowed the ordinary way.
- Clips with one clear, steady movement across the frame: a jump, a pour, a skateboard trick, a door closing.
- Salvaging a shot you already have, when reshooting it at 120 fps is not an option.
Not for
- Long clips. The work is per generated frame, so a minute of source at 2x is roughly thirty times the wait of two seconds. Trim first.
- Footage that already runs at 60 or 120 fps. Slowing that in the Video Speed Changer gives you real photographed frames in seconds, and keeps the audio.
- Anything where the audio has to survive. This tool drops the track outright.
- Cuts, rain, confetti, heavy motion blur or whip pans. Interpolation needs something trackable between two frames, and warps when it has nothing.
When frame interpolation is worth the wait
- A short action beat — a jump, a pour, a reveal — that has to hold on screen longer than it was shot to last.
- Old or phone-shot 30 fps footage where the ordinary half-speed version steps badly enough to be distracting.
- Making a 4x ramp out of a 60 fps clip, where plain slowing runs out of real frames at 2x.
- Footage you would rather not upload to an online slow-motion service — everything here runs in the browser, on your own machine.
Supported formats & limits
| Input containers | MP4, MOV, WebM, MKV, AVI |
|---|---|
| Input codecs | H.264, H.265, VP8, VP9, MPEG-4, MJPEG. Not AV1 — the in-browser engine has no software AV1 decoder. |
| Slow factors | 2x or 4x |
| Output | H.264 MP4 (yuv420p), source resolution trimmed to even dimensions, flat 30 fps |
| Audio | None. The track is dropped rather than half-slowed — use Audio Speed & Pitch for the sound. |
| Typical wait | Measured on a desktop machine: 13.7 s per 2 s of 1280x720 at 2x in motion-compensated mode, 2.2 s at 480x270. Blend mode is roughly four times faster. Cost scales with pixel count, length and factor. |
| Practical length | Seconds, not minutes. The wait, not browser memory, is the limit here. |
| Cost | Free for any use. No signup. No watermark. |
Smooth Slow Motion vs. the usual alternatives
| Feature | This tool | VEED (free) | Kapwing (free) | CapCut Online |
|---|---|---|---|---|
| Processing model | Runs locally in your browser | Upload-based project editor | Upload-based project editor | Upload-based online editor |
| File limits | No upload cap; practical limit is browser memory | Plan-specific upload limits | Plan-specific upload and export limits | Feature- and account-specific limits |
| Watermark on output | No watermark added | Free exports include a VEED watermark | Free exports include a Kapwing watermark | Standard edits can be watermark-free; templates/assets may add branding |
| Signup / account | No account for tools | Workspace/account flow | Workspace/account flow | CapCut account flow |
| Works offline | Yes after cache, subject to browser support | No | No | No |
| Best for | Private one-step file operations | Full editor, templates, AI tools | Collaboration, templates, AI tools | Social templates and timeline editing |
Vendor plan limits were checked on April 29, 2026 and can change by region, account state, and export option. Verify critical limits on the vendor pricing/help page before relying on them.
Why use this slow motion tool
- It generates the in-between frames instead of holding each real frame longer, which is the whole difference between gliding and stepping.
- The wait is stated before you commit to it. The tool reads the clip’s resolution and length and projects from measured runs, and warns when the projection passes a minute.
- Blend mode is there to check the timing cheaply — about four times faster — before spending the full motion-compensated run.
- Nothing is uploaded. The interpolation and the encode both run in your browser, which is also why it is slow: one CPU thread, no server farm.
Frequently Asked Questions
How is this different from just slowing a video down?
A plain speed change stretches the timeline without adding frames, so each original frame is simply held longer and the motion steps. This runs FFmpeg minterpolate on the stretched timeline, which invents the frames that were never shot and fills it at a flat 30 fps.
Why does it take minutes when the other tools take seconds?
Motion-compensated interpolation runs a block motion search for every frame it generates, 30 per second of slowed output. Measured here on a desktop: 2 seconds of 1280x720 at 2x took 13.7 s; the same 2 seconds at 480x270 took 2.2 s. Cost follows pixel count and output length, which is what the estimate above the button is calculated from.
Motion-compensated or blend?
Motion-compensated tracks movement and keeps edges sharp. Blend cross-fades the two neighbouring real frames, so fast movement doubles up like a long exposure — but it measured about four times faster, which makes it a cheap way to check the timing first.
Why is there no audio?
Slowing audio is a separate decision — pitch down with it, or time-stretch to preserve the pitch — and picking one silently would be worse than leaving it out. Use the Video Speed Changer for a slower clip with usable audio, or Audio Speed & Pitch to handle the sound on its own.
When does interpolation look wrong?
Where there is nothing to track: a hard cut inside the clip, objects appearing from behind others, heavy motion blur, rain or confetti, or a whip pan. You get warping, torn edges and smeared halos. Footage genuinely shot at a high frame rate always beats generated frames.
My clip is already 60 fps — do I need this?
For 2x, probably not: half speed gives you 30 fps of real photographed frames, and the Video Speed Changer does that in seconds with the audio intact. This tool earns its wait on 24, 25 and 30 fps sources, or at 4x.
What comes out?
An H.264 MP4 at the source resolution and a flat 30 fps, with no audio track — an odd width or height is trimmed by one pixel, because H.264 cannot encode odd dimensions. The runtime is your clip multiplied by the factor you picked.